This is the first post in a series about replacing the wood bed in our 54 Chevy pickup. It will be similar to the Fiberglass Fly Rod series. Click the Fly Rod category if interested. I’ll emphasize what is learned along the way.
Replacing the wood bed has been on the list. We have the new rails and bolts, and the wood is in the basement. The summer cruising and fishing season is over so it’s time to start. Plans are always easy. You measure the width of the old boards, remove them, cut and finish the new boards, install them, and hit the road. Just so you know, we are using Colorado beetle-kill pine. It is a local wood and contains violet streaks that match the light purple of the truck. It’s not oak or ash, but we’re not carrying engine blocks or seed grain. We may sit in the back on lawn chairs at the drive-in move with carpet on the deck.
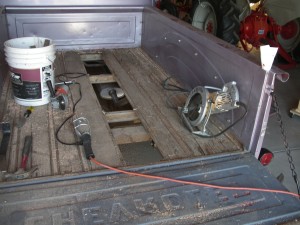
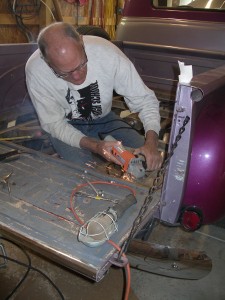
The original wood was in very bad condition and the rails very rusty. This resulted from moisture collecting under the steel plate placed over the wood bed. 72 bolts holding the bed in place had to be cut out. Turn the nuts, and the carriage bolts rotated in the rusted holes. I cut each rail crosswise on both sides of a bolt head and then lengthwise on one side of a head. Then I could get the cutoff wheel under the rail to cut the bolt shank. The Skill Saw with a carbide blade made the crosswise cuts when it would reach; otherwise, the cutoff disk had to be used. This became more complex at the sides of the bed, but pry bars, hammers and chisels along with expletives got the job done. It was a project for manly tools, making great noise and serious mess.
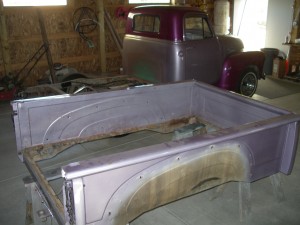
 It turns out that the truck bed and box is held to the frame with only six bolts. Once they were removed we placed the box and bed on saw horses. Two bolts removed the tailgate, and a few more each fender. This provided good access to the next really hard step. On the sides of the bed the wood is bolted to an angle that is spot welded to the box. There are twenty welds on each side and they all had to be cut with a reciprocating saw. Again, prying, expletives, and saw blades were equal to the task. New angle stripe will be bolted on.
What’s a project if it doesn’t require a new tool. Harbor Freight provided a 4″ Angle Grinder, on sale for $19.99. I’ve used it hard and often. If I didn’t have to drive fifteen miles I’d buy another one just so I didn’t have to change wheels.
There’s a sandblaster in town who will blast all the exposed frame and rear end so that we don’t have to clean off 56 years of road deposit. I’ll paint this with black epoxy primer. The box has a couple of rust spots that will be painted with a rust conversion paint like POR15, and then we will prime and paint the whole box. I’ll cut and finish the wood clear without stain. Then it all goes back together. Did I mention lots of sanding and having to learn how to spray paint?

Leave a Reply